
postgres-terminate-connection
watch
Watch specified processes every second watch -n 1 'ps aux | grep ssh'
running-scripts-in-background-linux
I used to execute a lot of commands with & at the end. But once I used plowshare and it didnt work because & works until you wont log out .So my solution (I know I could use nohup :) ) was screen. Screen is the best tool admin can use when working remotely. It can be usefull when you're in place with big packet loss and you often lost connection so when you're restoring database you should be in screen session because when something will disconnect you you can alwas log in and connect to screen session in which restoring is taking place.
So executing
will be only running when your session is still active so when you'll logout it will be killed.
To run it independent from your presence on server do it with nohup:
To launch screen :
Best practice is to launch screen with its name :
Then if you want detach screen to get back later Ctrlad If you want terminate screen just Ctrld or exitthen you can resume it with:
To list all available screens :
To attach to already attached screen:
To attach to attached screen and detach others:
To rename existing screen:
(being attached): Ctrla:sessionname my_screen_nameEnterEasy admin joke
When I first got admin access ages ago on shared server I wanted to do something funny to my coleague so I thought to display something on his screen.
Remembering everything in Linux filesystem is a file or a directory I read about pseudoterminals "pts" they are inside /dev directory
Yea yea I know 3 rules of admin : Respect the privacy of others. Think before you type. With great power comes great responsibility bla bla bla ...
To do this joke just check who is logged in and on which pts is he :
$ who
greg     pts/3        2012-03-10 1:26 (:0)
mark     pts/5        2012-03-10 10:29 (:0)
jenny    pts/7        2012-03-10 13:06 (:0)
So now, we know that Mark is working on pts/5 so lets send him message :)
To "clean evidences" :D ( remember that guy working on this terminal will lost his current works he's working on this specific terminal)
MySQL
MySQL tips:
Create database with charset utf8
Grant everything to local user on all tables
Grant everything to remote user on all tables
GRANT ALL PRIVILEGES ON db_name.* TO my_user@'IP_of_host_user_connects_from' IDENTIFIED BY 'my_secret_password';
If you want to add only SELECT or something else instead of ALL there are other available privileges like:
SELECT, UPDATE, ALTER, CREATE, DELETE, DROP, SHOW DATABASES CREATE TEMPORARY TABLES, EXECUTE, FILE, GRANT OPTION, INDEX, INSERT, LOCK TABLES, PROCESS, REFERENCES, RELOAD, REPLICATION CLIENT, REPLICATION SLAVE, SHUTDOWN, SUPER, USAGE
After all you want to reload privileges because when mysqld starts, it reads all grant table contents into memory. The in-memory tables become effective for access control at that point. To tell the server to reload the grant tables, perform a flush-privileges operation.
Execute sql :
or you can even do it from shell by
or
postgres
Quick tip:
I started with MySQL db (not speaking of Delphi ADO or something like this ) Now because of my job I had to switch to Postgres and I thought "ok but it's SQL so it will be the same" - not really I had a lot of problems like in the beginning like user privileges owners of databases and tables, showing tables , showing databases So if youre switchng from mysql it can help you for beginning:
So first problem was my user access - I couldnt access postgres even through root :) so after clean installation if you want to launch psql client for postgres just su as postgres after that you can create your own super user or user having privileges to specific database
and then you should be able to do everything
To see databases "show databases;" didn't work anymore :) in postgres
connect to database:
show tables; in database:
Explain or describe table:
Show all shortcuts:
Backup
To dump database to sql script with inserts etc use pg_dump remember (it wont dump user privileges):
The better way of dumping database is pg_dumpall it dumps database users and groups, tablespaces, access permissions that apply to databases as a whole.
If you want to move your users of postgres to different server you can:
Restore
TO simply restore backup pgdump sql file :
Access Privileges:
Another way is about accessing postgresql if you worked with mysql you could just provide : grant all privileges on db to user_name@localhost or user_name@'10.0.0.1' here it's not the same. Privileges can be configured in low level pg_hba.conf file where you provide who(sys user) who(db_user) where_from . Adding user in postgres:
Create user:
change owner of db:
change owner of tables:
rename db
Drone - Aerial photos
DJI Phantom 2 + Zenmuse gimbal h3-3d + Gopro Hero Black 3+
Kensington Gardens 09.06.2014
Cameraman : DJI Phantom 2
Camera: Zenmuse gimbal h3-3d + Gopro Hero Black 3+
Kensington gardens and curious dog
Sunny River Thames
Kensington Gardens
River Thames
Ar drone 2 with stock HD camera
Castle
Church
Stupid drone chooses freedom
Kensington park London
Drone attacked by birds
shell_productivity
Bash / ZSH Terminal productivity
:w
ctrlu clear whole linectrlk clear everything after curson
ctrlw clear everything before curson
ctrla set cursor at the beginning (home)
ctrle set cursor at the end (end)
ctrly undo last clear or repeat after second hit
ctrll clears screen
ctrlr search in you history commands type twice to select next candidate
ESCt Swap the last two words before the cursor
Altf Move cursor every word forward
Altb Move cursoor every word backward
ctrl_ Undo the last change
giffgaffbot
Last time I wanted to buy new Samsung Galaxy S 5 I liked blue one but there was no preorder option on giffgaff website (it was cheapest there) so to notify me I wrote a bot in pycurl and placed job in cron to send me an email when ot will be in stock.
Cut of sourcefragment from giffgaff webpage:
<form id="frmBuyPhone" action="/samsung/samsung-galaxy-s5/phone-plans" method="post" data-color-memory-mapping='
{"black":{"16":{"price":"517","sku":"GG1SAS5BBN","stock":1,"isLoanAvailable":true,"minMonthlyPayment":2139,"minAPR":970}},
 "white":{"16":{"price":"517","sku":"GG1SAS5WWN","stock":1,"isLoanAvailable":true,"minMonthlyPayment":2139,"minAPR":970}},
 "blue":{"16":{"price":"517","sku":"GG1SAS5BLN","stock":1,"isLoanAvailable":true,"minMonthlyPayment":2139,"minAPR":970}},
 "gold":{"16":{"price":"517","sku":"GG1SAGS5GN","stock":1,"isLoanAvailable":true,"minMonthlyPayment":2139,"minAPR":970}}}'
data-loan-mapping='{"GG1SAS5BBN":{"5000":{"24":{"deal_id":"7049","apr":970,"loan_amount":46700,"monthly_payment":2139,"total_payment":56336},"18":{"deal_id":"7053","apr":1140,"loan_amount":46700,"monthly_payment":2821,"total_payment":55778},"12":{"deal_id":"7057","apr":1470,"loan_amount":46700,"monthly_payment":4187,"total_payment":55244},"6":{"deal_id":"7061","apr":2580,"loan_amount":46700,"monthly_payment":8317,"total_payment":54902}}
The bot looks like this :
and added job to crontab to check every 5 minutes
*/5 * * * * /workspace/projects/checkbot/readweb.py
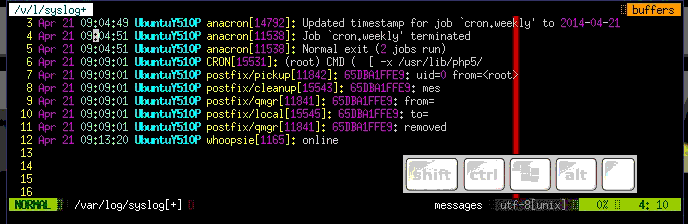
Quick vi / vim tutorial
This site is written to promote using VIM cause it's free, it has a lot of plugins and it can even be python IDE ;) and vi is also on every unix like system so logging to your clean instalation server it's good to know how to edit conf files.
If you don't want to read more on this site just have a look at basic commands which will be enough to edit and save file:
Remember all this commands should be executed within normal mode to do so press ESC.
:q ↵QUIT (being in normal mode to be sure you can always use ESC :q↵) most important command remember it to avaoid being character from famous "VIM quit joke" how to generate cat /dev/urandom::q! ↵quit without saving
:wq↵ - save and quit
yy - copy line
p - paste line
i - insert mode after that you're no longer in normal mode you can than start typig text
h j k l - left down up right or you can use arrows in vim
you can also find undo u nad redo ctrlr useful
I was inspired by Onjin when I saw him typing in vim I was impressed of how his thoughts became text and functions in VIM so fast without even using a mouse :).
It takes a while to switch from another editor and get its habits (it took one month for me and I tried 3 times) but after all you will be happy using lightweight VIM.
To use vim you need to know that there are five modes (normal, insert, visual, select, command-line, Ex-mode)
There are 4 main modes you'll be using probably:
Normal - usually VIm starts in this mode where you can navigate through whole file and modify text. To get to this mode press ESC.
Insert : this mode is like it says - for inserting new text you can go to this mode by pressing i or a (being in normal mode ESC)
Visual : you can select text in this mode by pressing v (being in normal mode ESC) and moving for selection
Command-line : you activate it by pressing : (being in normal mode ESC)
Editing (enter commands below being in normal mode):
i - enter insert mode and place cursor at current position to start typing

I - enter insert mode and place cursor at start of the line to start typing

a - enter insert mode and place cursor after current position\ to start typing

A - enter insert mode and place cursor at the end of line to start typing

ea - append at end of word
r - replace a single character (does not use insert mode)
J - join line below to the current one

cc - change (replace) an entire line
cw - change (replace) to the end of word
c$ - change (replace) to the end of line
s - delete character at cursor and subsitute text
S - delete line at cursor and substitute text (same as cc)
d$ orD - delete after cursorxp - transpose two letters (delete and paste, technically)
u - undo
Ctrl r - redo
. - repeat last command
ESC - exit insert mode
Indedation
Examples:
:s/\n/ /g - replace all spaces with enter in current line
:%s/\n/ /g -replace all spaces with enter in all lines
:%s/\n/ /cg - replace all spaces with enter in all lines but with confirmation
Indedation
v then select block you want indent and press number of indedations2> - execute indentation on the selected block
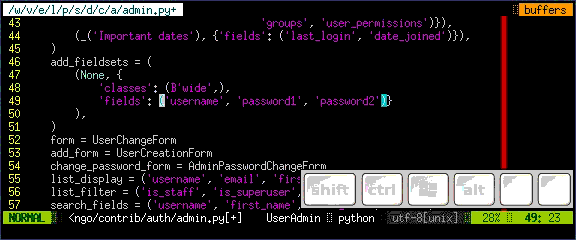
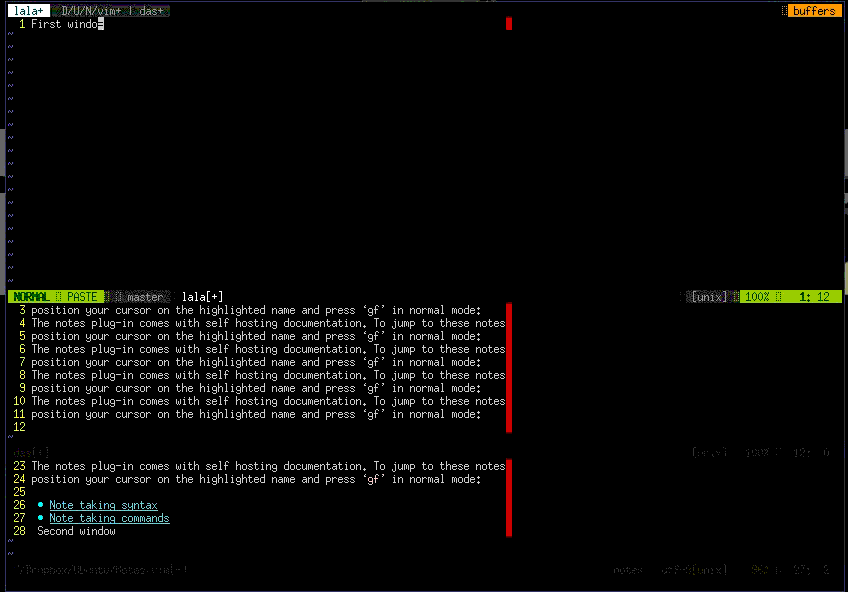
Marking text (visual mode)
v - mark lines with starting visual mode
d - (after starting selection with v ) cut selected text
y - (after starting selection with v ) copy (yank) selected text
p - (after cutting or copying selection) paste selected text after cursor
P - (after cutting or copying selection) paste selected text before cursor example of all 4 commands above:
V - start Linewise visual mode
o - move to other end of marked area
Ctrlv - start visual block mode
O - move to Other corner of block
aw - mark a word (being in visual mode)
ab - a () block (with braces) (or vab from normal mode)
aB - a {} block (with brackets)
ib - inner () block
iB - inner {} block
> - shift right
< - shift left
y - yank (copy) marked text
d - delete marked text
~ - switch case
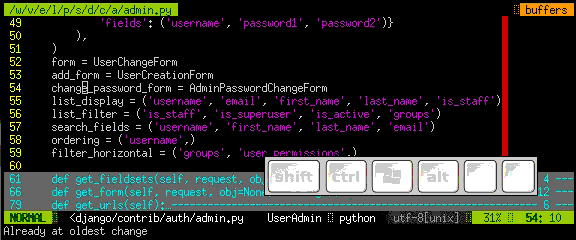
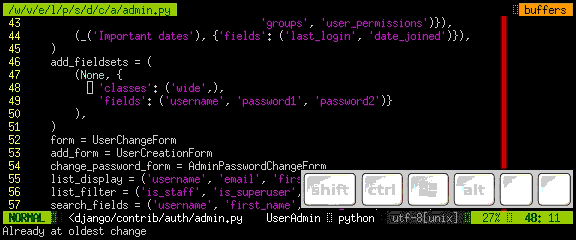
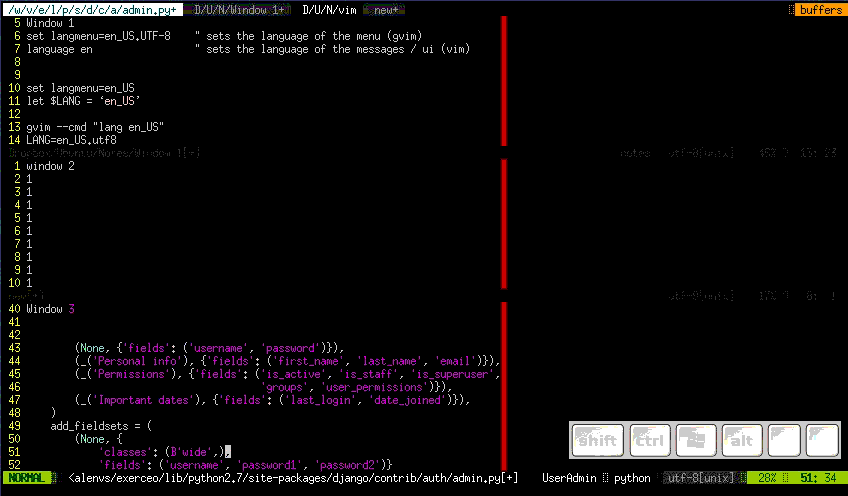
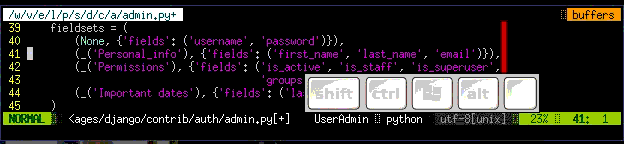
Layout/windows:
Ctrlww - swith between windows
Ctrl w ⇧ - move cursor up a window example using ctr ww and ctr w arrows in example before switching windows ESC was pressed to enter normal mode:
ctrl w + - increase size of current window
ctrlw- - decrease size of current window
ctrlw\_ - maximize current window
ctrlw= - make all equal size
10ctrlw+ - increase window size by 10 lines
:vsplit file - vertical split
:sview - same as split, but readonly
:hide - close current window
:only - keep only this window open
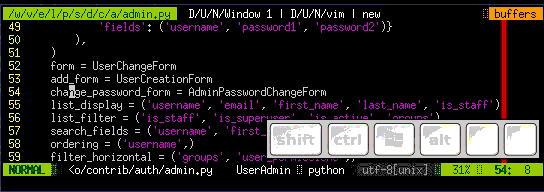
:ls - show current buffers
:b 2 - open buffer #2 in this window
Movement:
w - next word by punctation

W - next word by spaces
b - back word by punctation
B - back word by spaces
e - end word by punctation
E - end word by spaces
h - move left
j - move down
k - move up
l - move right
^ - first non-blank character of line
) - zero) start of line
$ - end of line
G - Go To command (prefix with number 4j moves down 4 lines.
Operations on file:
:e - open file in new buffer
:w - write file to disk - save
:w filename save as
ZZ - write file to disk and quit like :wq
:wq - save file and quit
:n - edit a new file
:n! - edit new file without saving current changes
:q! - quit without changes
:q - quit editing file
:e . - directory explorer
:split - filename - split window and load another file
:sview file - same as split, but readonly
Split window:
CtrlWs - horizontal splitting
CtrlWv - for vertical splitting
Ctrlwq - close window
Split window: repeat insert in blockview ctrlv - select block then I -text ESC